How to Choose Personalized Shipping Boxes for Business?
Choosing Personalized Shipping Boxes is not simply a design decision. It affects product protection, shipping costs, and the first impression customers get when a parcel arrives. Packaging educator Walter Soroka’s work points to a useful principle: “A box must protect its contents throughout the journey, not just look good at dispatch.” Treat that as practical guidance, not a verified verbatim quotation.
Start with the product. Note its weight, dimensions, fragility, and how it sits inside the box. A ceramic mug, for example, needs a snug fit and cushioning; a soft garment may need less structure. Then consider the route: a box handled across several delivery stages faces different stresses from one collected locally. Small details matter. A few millimeters of extra space can allow items to shift.
Branding matters, too. A clear logo, readable colors, and a neat unboxing can make a plain corrugated box feel considered. But decoration should not weaken the package or add cost without purpose. Test sample boxes with real products before ordering in bulk. Check the corners, seams, and fit after handling. It may feel slower. It can prevent expensive surprises.
There is no perfect box for every business. Materials, order volumes, and customer expectations differ, and early choices may need revision. Compare supplier samples, ask about print options and minimum quantities, and review the total cost—not only the price per box. The right Personalized Shipping Boxes balance protection, appearance, and practical use, while leaving room to learn from actual shipments.
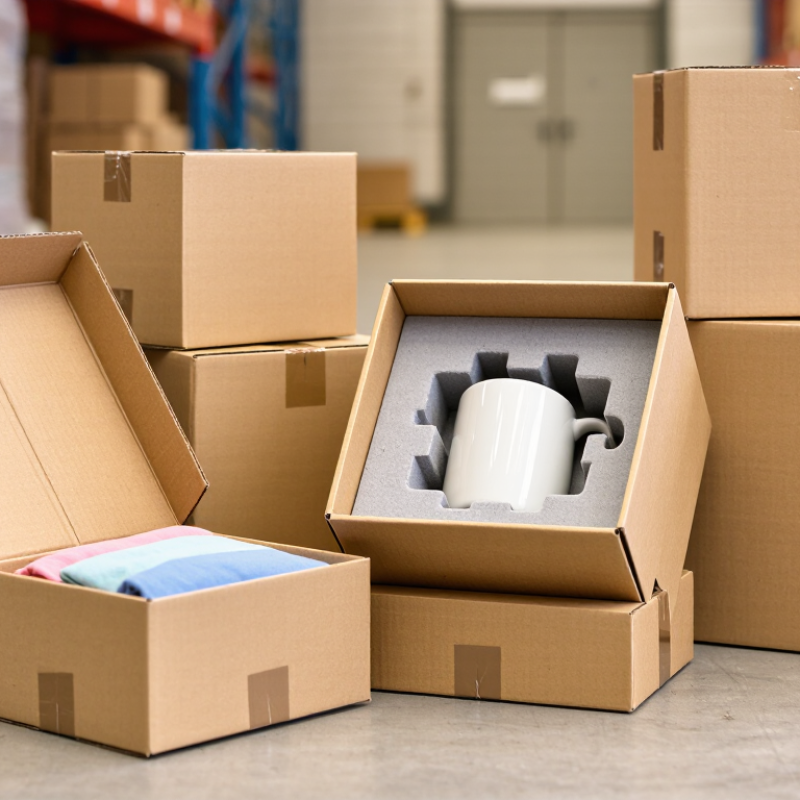
Define Your Business Needs and Shipping Requirements
Before choosing a printed box, document what it must carry and how it will travel. Measure products after assembly, including handles, lids, and protective inserts. Measure real products. Record packed weight, fragility, and whether orders contain one item or several. Then review the routes: local delivery, long-distance parcel shipping, or frequent transfers between carriers all create different handling demands.
The U.S. Census Bureau estimated that U.S. retail e-commerce sales reached $352.9 billion in the fourth quarter of 2024, or 16.1% of total retail sales. That scale makes packaging decisions operational, not merely visual. Check your own order data: product mix, peak-season volume, damage claims, and returns. A box that fits a single best-selling item may waste space or fail when a mixed order arrives. We often underestimate this variation.
Set practical specifications before requesting a custom design: internal dimensions, board strength, closure method, cushioning, and required print area. The U.S. EPA reported that containers and packaging generated 82.2 million tons of U.S. municipal solid waste in 2018. This figure covers many packaging types, not shipping boxes alone, but it highlights the material stakes. Test a sample with your heaviest typical order and actual packing process. Note any awkward folds or excess void fill; real packing lines rarely behave perfectly.
Choose Box Size, Structure, and Closure
Personalized shipping boxes should fit the product, not just look good in a design preview. Measure the item at its widest points, including any protective wrap you plan to use. Record the inside dimensions you need, since listed box sizes may refer to interior or exterior measurements. Leave enough room for padding, but avoid a large empty space that lets products shift. Too tight can also cause trouble. A snug fit should still allow the box to close without pressing on the contents.
Choose the structure based on the item’s weight and fragility. Lightweight products may suit a folding carton, while heavier or delicate goods often need a sturdier corrugated box. Consider how the box will be handled and stacked during delivery. Closure matters, too: tuck flaps can give a clean finish, while adhesive strips or packing tape may be more practical for repeated handling. Test a sample with the actual product. A design that looks neat on screen may be awkward to pack.
Tips: Check the fit with real padding, then gently shake the sealed box. If the item moves, adjust the insert or box size. Also test the opening experience; an overly tight closure can frustrate customers. It’s easy to overlook that.
Select Materials and Personalization Options
Choosing personalized shipping boxes starts with the product’s weight, shape, and journey. Corrugated cardboard offers cushioning for many everyday shipments, while lighter paperboard may suit products that need less protection. Ask suppliers about flute style, board strength, and recycled content, then compare samples with your actual items. A box that feels sturdy empty may behave differently once packed. Test before ordering.
For personalization, prioritize what helps customers recognize and handle the package. A logo, brand colors, or a short printed message can make a plain box feel considered. Keep important details away from folds and tape seams, where they may become hard to read. One-color printing can be a practical starting point; full coverage may add cost and does not always improve the unboxing experience. Less can work. Review a physical proof under ordinary indoor light, since screen colors can look different.
Tips: Measure the packed product, not just the item. Leave room for protective fill without allowing the contents to slide. Test a sample through your normal packing routine, including sealing and label placement. If the design looks crowded, remove one element and reassess. It is easy to overdecorate, and I would rather catch that before a full production run.
Test Box Protection, Branding, and Shipping Compatibility
A personalized box should protect the product before it promotes the business. Pack a real order using the items customers receive, including padding, inserts, and paperwork. Leave enough room to cushion the product, but avoid gaps that let it slide. Then gently shake the closed box. Listen for movement. Check whether corners buckle or the contents shift after a short drop onto a firm surface. This is a practical screening test, not a guarantee against every handling condition.
Branding needs a shipping test, too. Print a sample with the intended colors, logo size, and placement. Fold and tape the box, then inspect whether seams or labels cover important details. A clean design can look different on rough corrugated board. It may need adjustment. Also check that ink remains readable after ordinary handling; glossy finishes can scuff, while small text may disappear against a busy pattern.
Measure the packed box, not just its flat dimensions. Compare its length, width, height, and weight with the shipping options your business actually uses. Oversized packaging can raise costs, and a tight fit may leave too little protection. Test a few sizes with typical orders. Record what fits and where damage or packing delays occur. One trial can miss seasonal products or rushed packing, so review the results with whoever handles fulfillment.
How to Choose Personalized Shipping Boxes for Business
Compare box options across protection, product fit, print readability, and shipping compatibility. Higher scores indicate a stronger result for that criterion.
How to use this chart: These illustrative scores are not industry benchmarks. Assess protection with drop tests, fit using packed dimensions and void space, branding through print-legibility checks, and shipping compatibility against the size and weight limits of your chosen service. Replace the example scores with your own test results.
Compare Suppliers, Costs, and Production Timelines
When comparing suppliers for personalized shipping boxes, send each the same specification: box dimensions, board strength, print coverage, order quantity, and delivery address. Request separate prices for setup, samples, production, freight, and any storage fees. A low unit price can hide costly setup charges. Check the quote.
Pitney Bowes’ 2024 Parcel Shipping Index reported 21.7 billion U.S. parcels in 2023. That scale makes packaging consistency important: a box that is slightly oversized can affect shipping costs across many orders. Ask suppliers for a sample and test it with your actual product, cushioning, and packing process. Compare board grade and print quality, not just appearance. A polished sample does not guarantee every production batch will match.
Production timelines need the same scrutiny as price. Ask for dates covering artwork approval, proofing, manufacturing, and freight, then confirm what could delay each stage. Get the schedule in writing, including the first delivery date and reorder lead time. Local production may reduce transit time, while overseas production can require earlier ordering and more buffer stock. Neither option is always cheaper overall. I would still leave room for a delay; schedules can slip, especially when artwork changes late.
